Geofence creation guide
Prerequisites
Before creating geofences, ensure that Geofence Credits are available in your account. Without active credits, geofence creation is not possible.
Creating a Geofence
To create a new geofence, click the + New Geofence button on the Device Locator page.
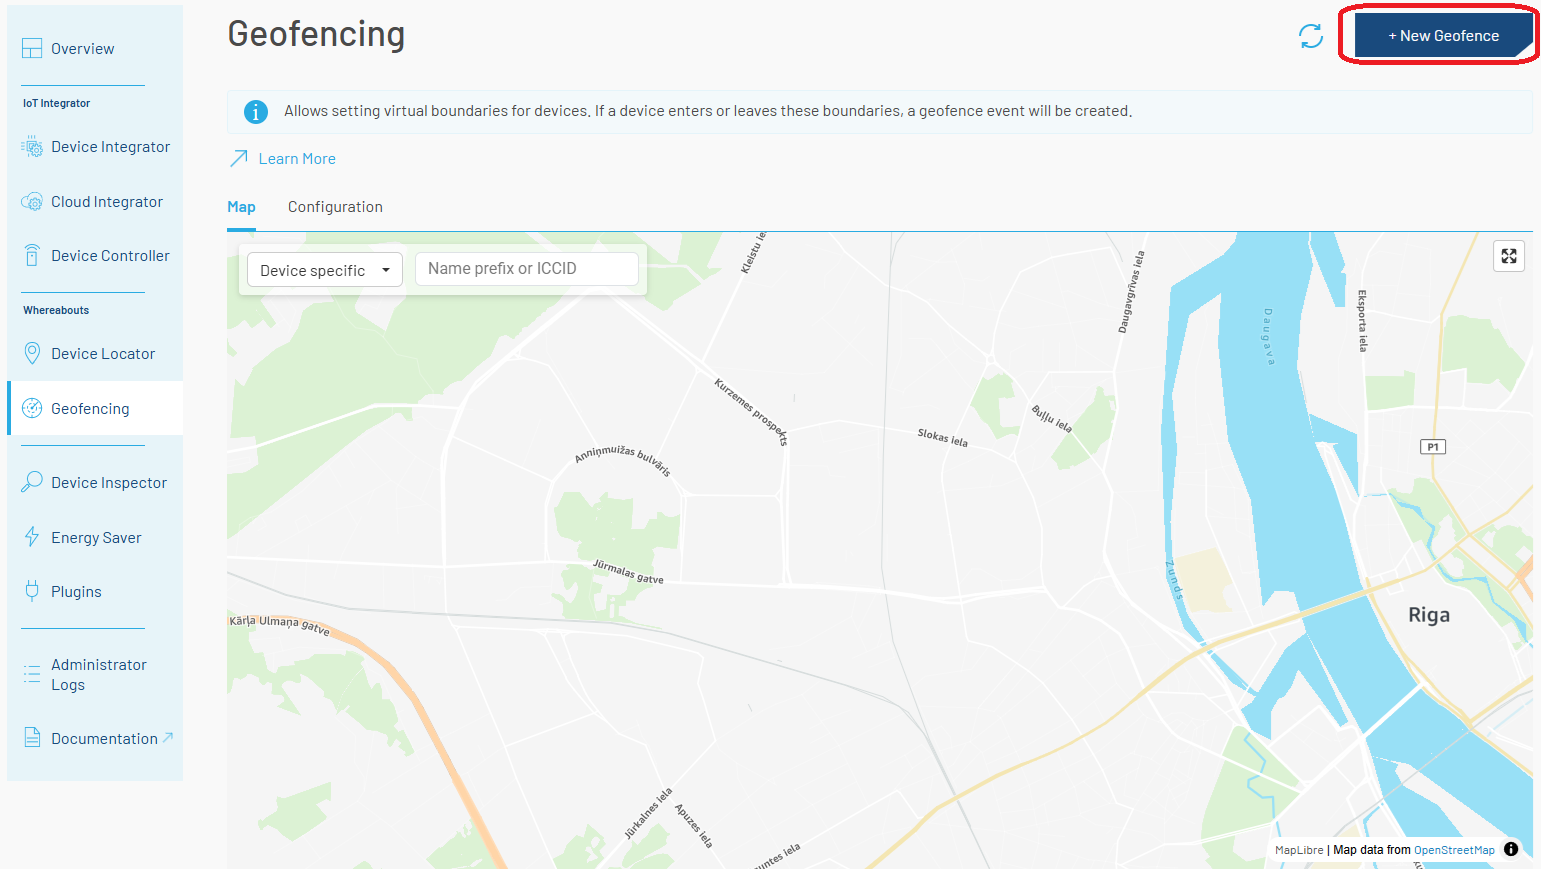
New Geofence button
Scope
Select the scope for the new geofence — Global or Device Specific.
- Global geofences apply to all devices in your account. You can create up to 10 global geofences.
- Device Specific geofences are tied to a single device (identified by ICCID). You can create 1 device-specific geofence per device.
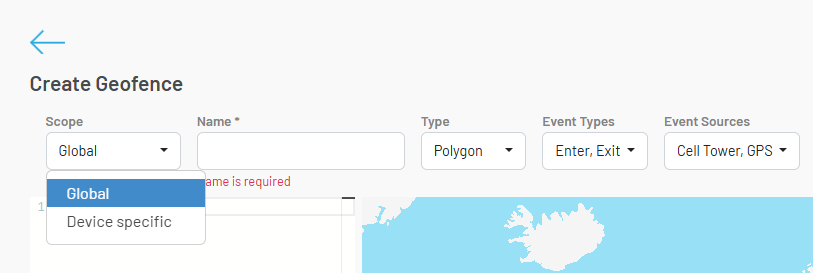
Geofence scope selection
Name
Enter a name for the geofence.
For device-specific geofences, you can later filter geofences either by entering the full ICCID or by searching multiple geofences by name prefix. Choosing a consistent naming convention (e.g., a shared prefix like warehouse- or fleet-) makes it easier to find and manage groups of device-specific geofences.
Type
Select the geofence shape — Polygon or Circle.
- Polygon — draw the geofence boundary directly on the map by placing up to 50 coordinate points.
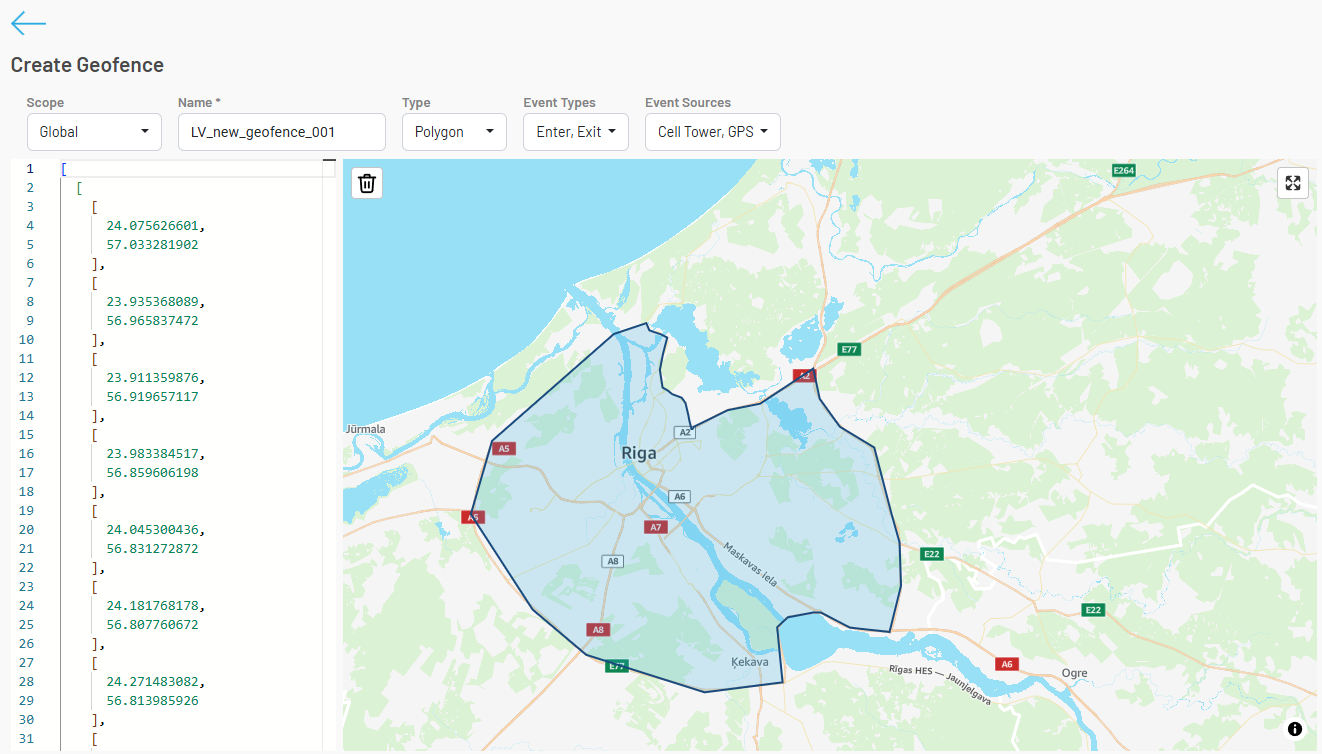
Polygon geofence
- Circle — draw a circle around a selected center point on the map. The radius must be between 50 m and 30,000 m.
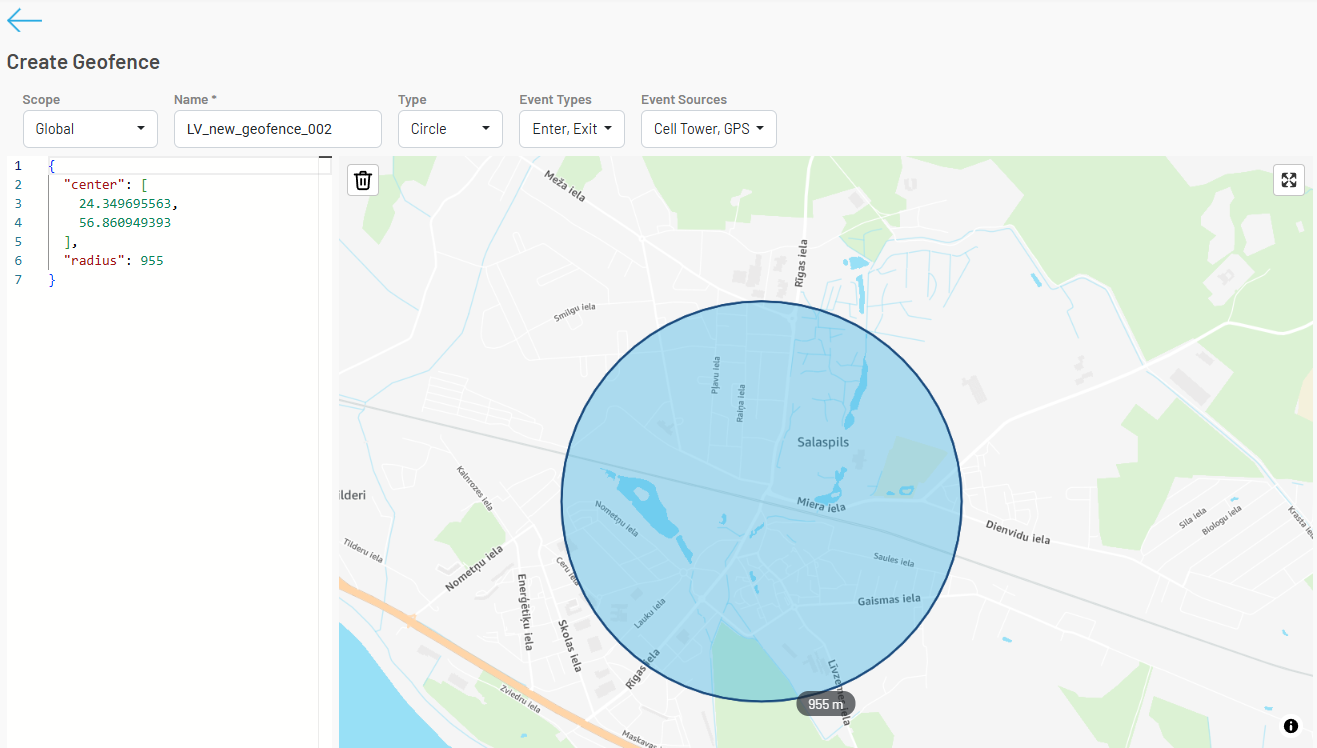
Circle geofence
Event Types
Choose which crossing events should trigger a geofence event:
- Enter — triggered when a device enters the geofence boundary
- Exit — triggered when a device exits the geofence boundary
- Enter & Exit — triggered on both entry and exit
Event Sources
Select the location data source used to evaluate geofence crossings:
- Cell Tower — uses cell tower-based location data
- GPS — uses GPS coordinates reported by the device (via Energy Saver or LwM2M)
- Cell Tower & GPS — evaluates against both sources
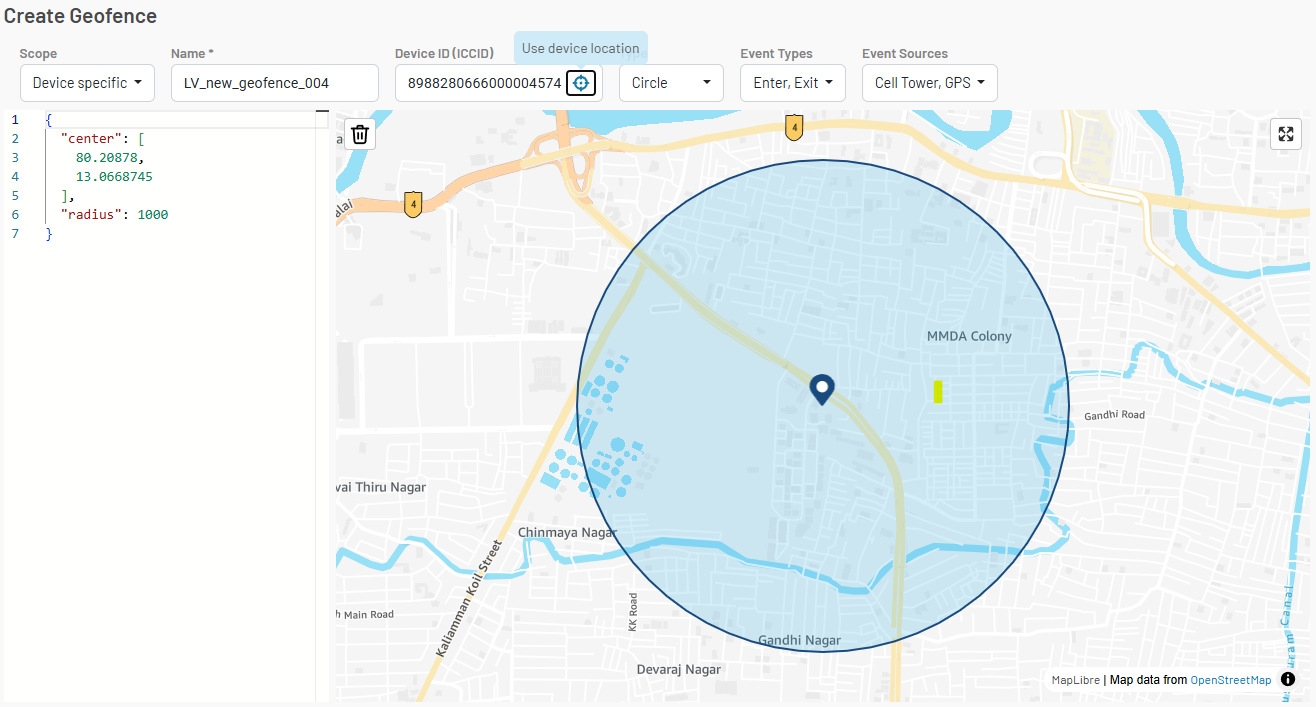
ICCID (Device Specific only)
Enter the ICCID of the device. The system can automatically determine the latest device location (if available).
Device location is available:
When creating a device-specific geofence with the Circle type, the system retrieves the latest known device location. To use this location as the center of the circle, click the location icon next to the filled ICCID field.
Device location available
Device location is not available:
If the device does not have a known location, the system cannot automatically determine its position. You will need to draw the geofence boundary manually on the map.

Device location not available
Viewing Geofences
Besides viewing geofences in the portal, you can also retrieve the full list programmatically via the Get all geofences API endpoint.
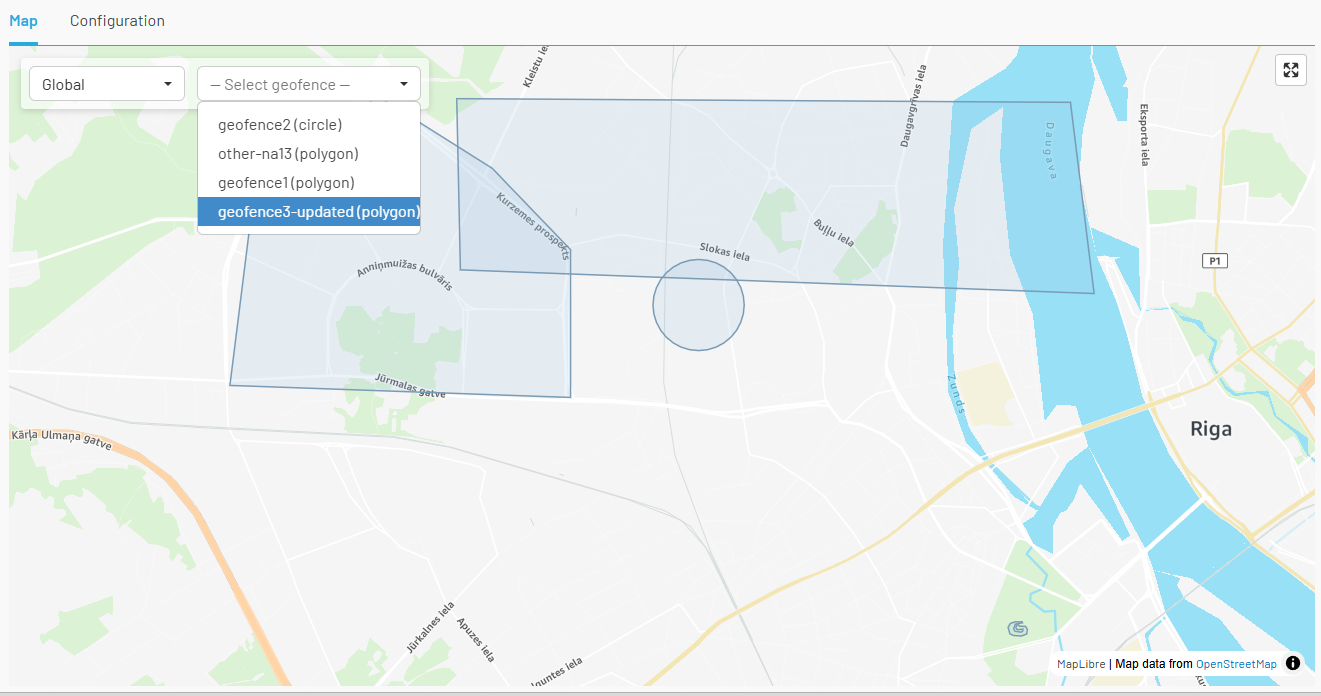
Global Geofences
When the global geofences view is selected, all global geofences are loaded and shown in the dropdown list. All global geofences are also placed on the map.
Global geofences view
Device Specific Geofences
When looking for device-specific geofences, you can either enter the full ICCID or use a name prefix to filter results (up to 10 geofences will be shown).
By full ICCID:
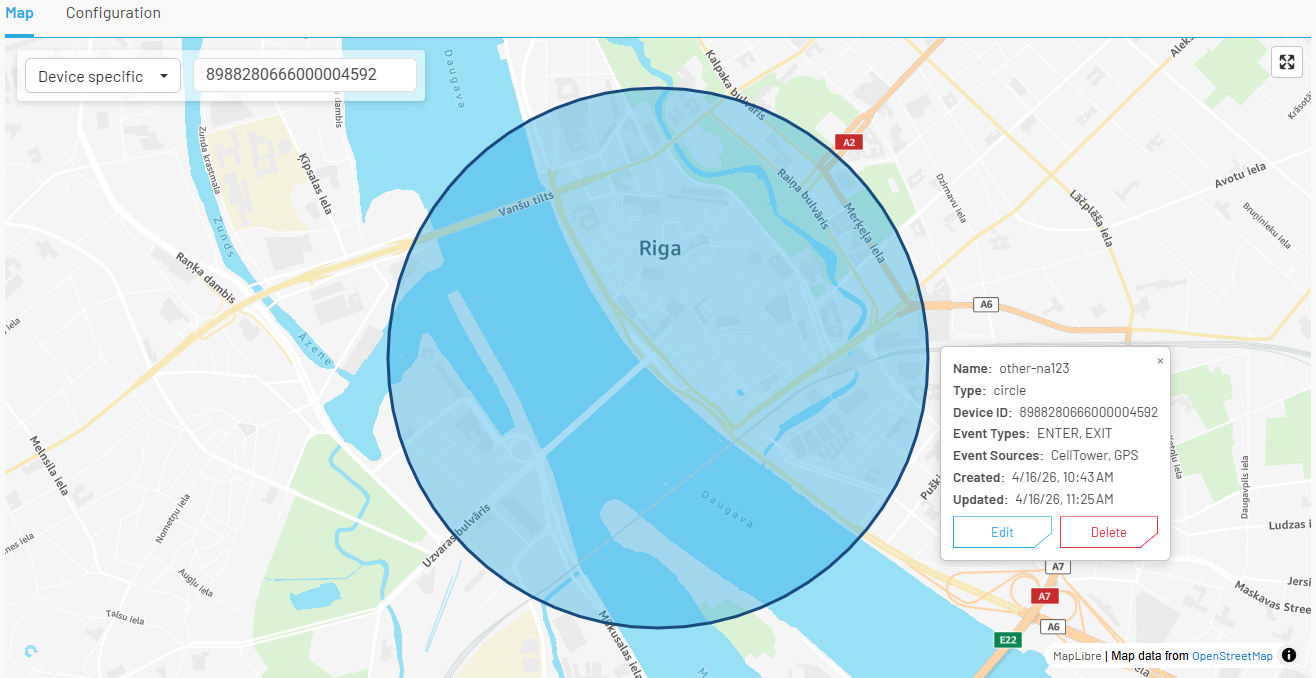
Filter by full ICCID
By name prefix:

Filter by name prefix
Editing and Deleting Geofences
By clicking on a geofence, you can view its details and choose to Edit or Delete it.
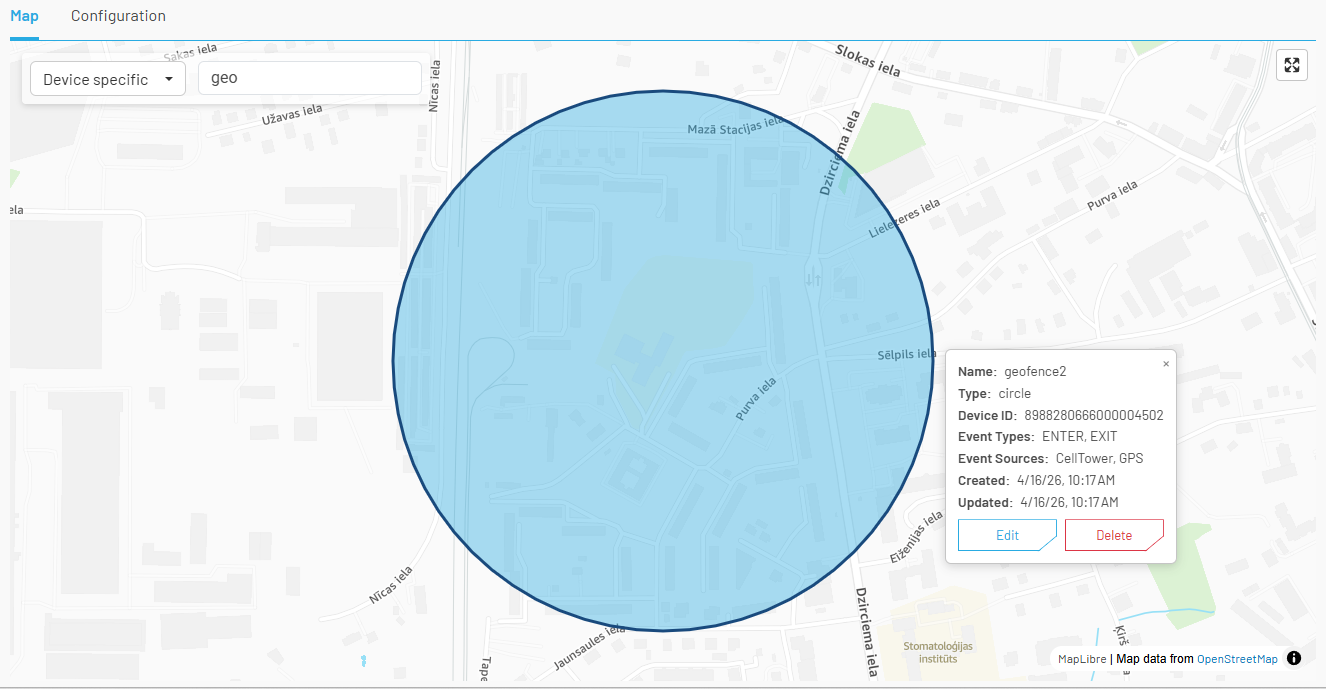
Geofence details
When editing a geofence, only the following fields can be changed:
- Name
- Event Types
- Event Sources
Coordinates and geofence type cannot be modified. To change the shape or location, delete the existing geofence and create a new one.
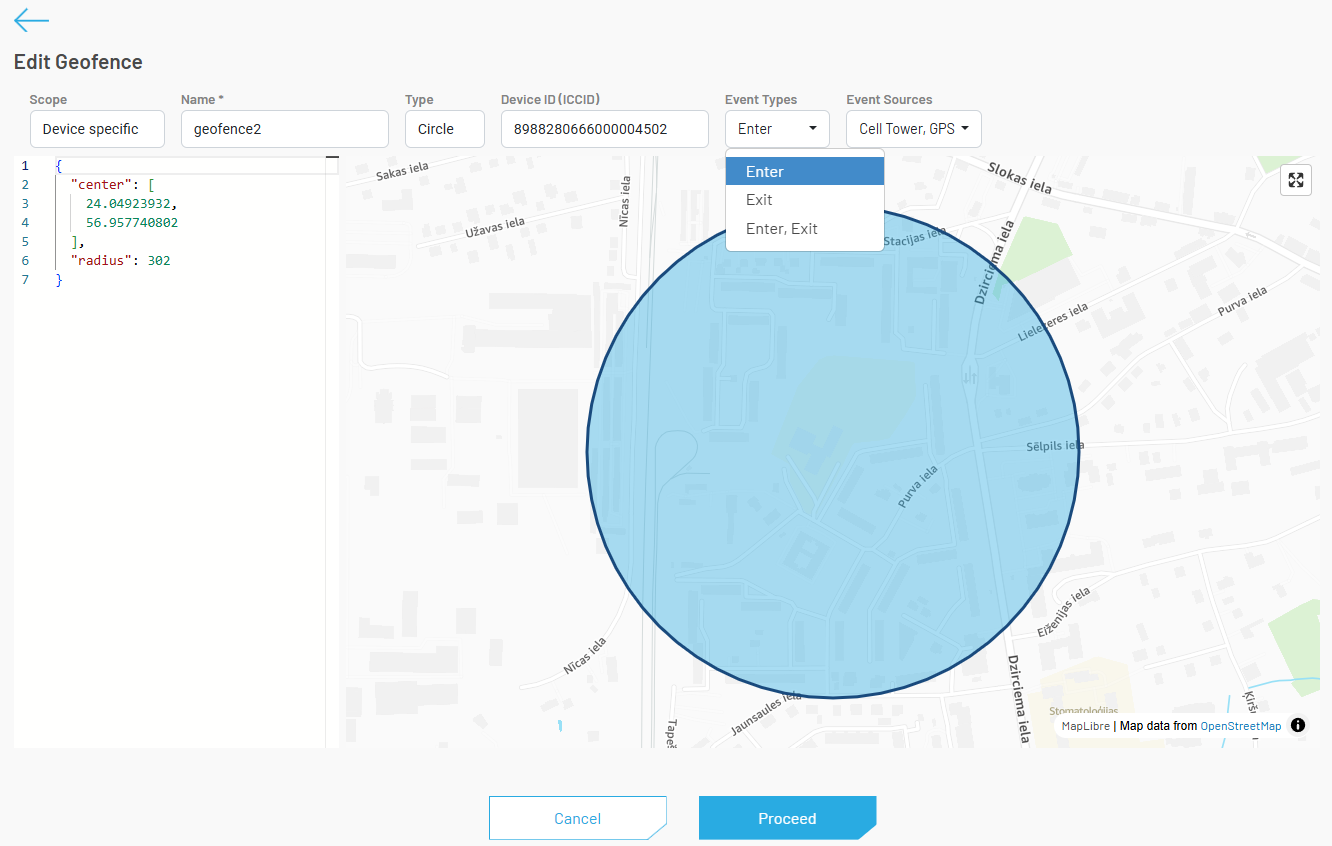
Edit geofence
Quick Test: End-to-End Validation
Ensure you have active Geofence Credits before proceeding.
Follow these steps to quickly validate that your geofence setup is working correctly.
1. Create a Cloud Integration
Set up a Webhook Cloud Integration and select Geofence as the Event Type. A temporary webhook (e.g., using webhook.site) is sufficient for testing purposes.
2. Simulate a GPS location for your device
Use the Energy Saver template example to send a GPS location from your device. This establishes the initial device position.
3. Create a device-specific geofence using the device location
Create a device-specific circle geofence as described in the ICCID section. The system will use the location reported in step 2 as the center of the geofence.
4. Simulate new GPS locations that enter and exit the geofence
Using the same Energy Saver template example, send GPS coordinates that are inside and then outside the geofence boundary. This triggers Enter and Exit events.
5. Validate geofence events in the Webhook
Check your webhook endpoint for incoming geofence events. You should see ENTER and/or EXIT events depending on the simulated locations and your geofence event type configuration.
Retrieving Geofence events
After geofence is created, Cloud integrator will create ENTER and EXIT events on every geofence border crossing by device, depending on the configuration of geofence eventTypes, eventSources and also device location update frequency.
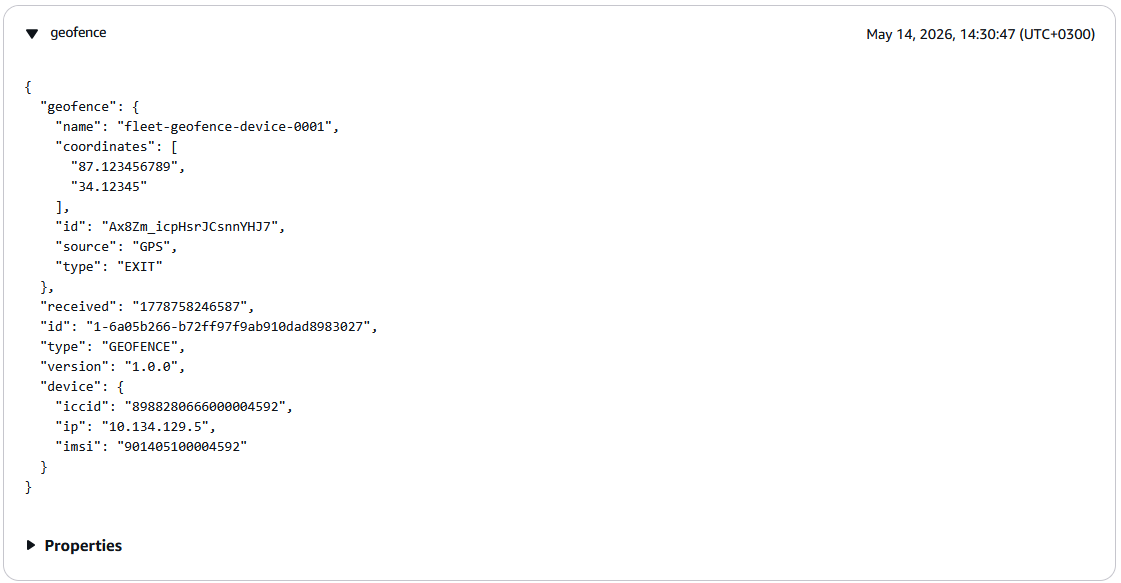
Geofence EXIT event from GPS source in AWS Cloud Integration
Please see Cloud integrator output format for details of geofence events.