User Management
The 1NCE Customer Portal offers the option to create multiple user accounts which allows for different user roles and access rights. Authorized users can create and manage additional user accounts according to their assigned role. A general overview of all users within the 1NCE organization is available in the "Users" tab.
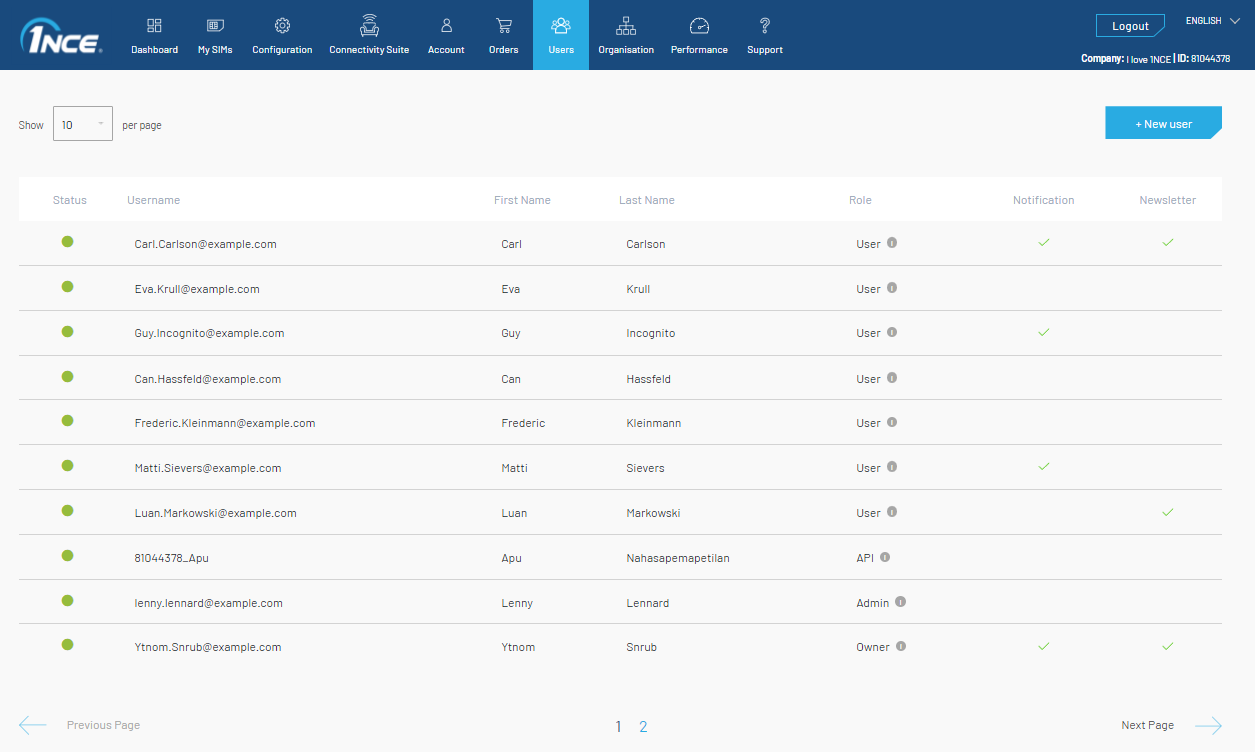
User Roles
The following roles for additional user accounts are available:
| Role | Description |
|---|---|
| Owner | Includes all functionalities and access to the entire organization. Can generate Management API credentials under Account → Management API Access. Can administer users assigned the Owner, Administrator, User and Read Only roles. |
| Administrator | Includes all functionalities and access to the entire organization. Can generate Management API credentials under Account → Management API Access and administer users with the Administrator, User and Read Only roles. |
| User | Can manage SIM cards in the Customer Portal, but cannot access the Shop, perform Top-Up or trigger new orders. Can administer users assigned the User and Read Only roles. |
| Read Only | User role designed to allow Read-only access to the Portal. |
User Roles Details
See the following table for an exact overview of the roles and the permissions for each component of the 1NCE Portal.
| Portal Areas | Owner | Administrator | User | Read Only | Notes | |
|---|---|---|---|---|---|---|
| Dashboard | Access Dashboard | ✅ | ✅ | ✅ | ✅ | Access to the Dashboard page |
| Data Volume | ✅ | ✅ | ✅ | ✅ | Informational section | |
| SMS Volume | ✅ | ✅ | ✅ | ✅ | ||
| Data Usage | ✅ | ✅ | ✅ | ✅ | ||
| SMS Usage | ✅ | ✅ | ✅ | ✅ | ||
| Current SIM Status | ✅ | ✅ | ✅ | ✅ | ||
| My SIMs | Access My SIMs | ✅ | ✅ | ✅ | ✅ | Access to the My SIMs page |
| View SIMs list | ✅ | ✅ | ✅ | ✅ | Informational section | |
| Export SIMs | ✅ | ✅ | ✅ | ❌ | Action | |
| View SIM details | ✅ | ✅ | ✅ | ✅ | Navigation | |
| Extend SIM | ✅ | ✅ | ❌ | ❌ | Action | |
| Top-up SIM | ✅ | ✅ | ❌ | ❌ | ||
| Auto Top-up | ✅ | ✅ | ✅ | ❌ | ||
| Change SIM status | ✅ | ✅ | ✅ | ❌ | ||
| Reset SIM | ✅ | ✅ | ✅ | ❌ | ||
| IMEI/IMEI-SV Lock | ✅ | ✅ | ✅ | ❌ | ||
| View usage | ✅ | ✅ | ✅ | ✅ | Informational section | |
| View events | ✅ | ✅ | ✅ | ✅ | ||
| Send SMS | ✅ | ✅ | ✅ | ❌ | Action | |
| View SMS history | ✅ | ✅ | ✅ | ✅ | Informational section | |
| 1NCE OS | Access 1NCE OS | ❌ | ❌ | ❌ | ❌ | Not available for NGP |
| Configuration | Access Configuration | ✅ | ✅ | ✅ | ✅ | Access to the Configuration page |
| Network settings | ✅ | ✅ | ✅ | ✅ | Informational section | |
| Monthly limits per SIM | ✅ | ✅ | ✅ | ❌ | Action | |
| Global Auto Top-up | ✅ | ✅ | ✅ | ❌ | ||
| Global IMEI/IMEI-SV Lock | ✅ | ✅ | ✅ | ❌ | ||
| Data Streams | ✅ | ✅ | ❌ | ❌ | ||
| OpenVPN Configuration | ✅ | ✅ | ✅ | ❌ | ||
| Performance | Access Performance | ✅ | ✅ | ✅ | ✅ | Access to the Performance page |
| Performance | ✅ | ✅ | ✅ | ✅ | Informational section | |
| Incident | ✅ | ✅ | ✅ | ✅ | ||
| Account | Access Account | ✅ | ✅ | ✅ | ✅ | Access to the Account page |
| Customer and User data | ✅ | ✅ | ✅ | ✅ | Informational section | |
| Shipping addresses | ✅ | ✅ | ❌ | ❌ | Action | |
| Saved payment method | ✅ | ✅ | ❌ | ❌ | ||
| Orders | ✅ | ✅ | ✅ | ❌ | Informational section | |
| Download invoice | ✅ | ✅ | ✅ | ✅ | Action | |
| Download affected SIMs | ✅ | ✅ | ✅ | ✅ | ||
| View API credentials | ✅ | ✅ | ✅ | ✅ | Informational section | |
| Generate API credentials | ✅ | ✅ | ❌ | ❌ | Action | |
| Users | Access Users | ✅ | ✅ | ✅ | ✅ | Access to the Users page |
| View Users | ✅ | ✅ | ✅ | ✅ | Informational section | |
| Edit Own User | ✅ | ✅ | ✅ | ✅ | Action | |
| Add User | ✅ | ✅ | ✅ | ❌ | ||
| Edit Owner | ✅ | ❌ | ❌ | ❌ | ||
| Edit Administrator | ✅ | ✅ | ❌ | ❌ | ||
| Edit User | ✅ | ✅ | ❌ | ❌ | ||
| Edit Read Only | ✅ | ✅ | ❌ | ❌ | ||
| Delete Owner | ✅ | ❌ | ❌ | ❌ | ||
| Delete Administrator | ✅ | ✅ | ❌ | ❌ | ||
| Delete User | ✅ | ✅ | ❌ | ❌ | ||
| Delete Read Only | ✅ | ✅ | ❌ | ❌ | ||
| Shop | Access Shop | ✅ | ✅ | ❌ | ❌ | Access to the Shop page |
| Place order | ✅ | ✅ | ❌ | ❌ | Action | |
| Support | Access Support | ✅ | ✅ | ✅ | ✅ | Access to the Support page |
| View service requests | ✅ | ✅ | ✅ | ✅ | Informational section | |
| New service request | ✅ | ✅ | ✅ | ❌ | Action | |
User Creation
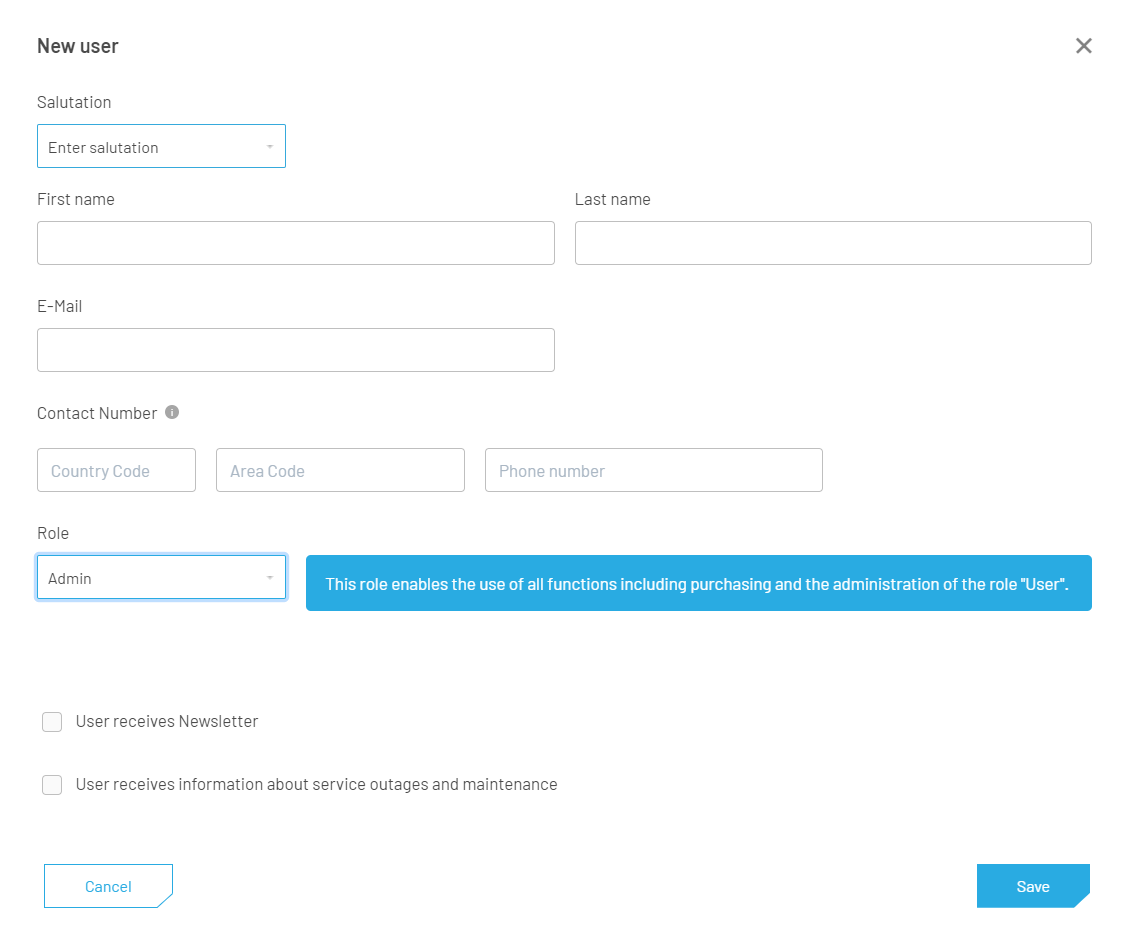
A new user can be created using the "+ Add User" button located at the bottom left of the Users section. The mandatory details depend on the type of the user that needs to be created. The e-mail address is used for the confirmation of the account as well as the login name for the 1NCE services. Customers have to make sure that the entered e-mail address is valid and can receive messages. After creating a new user an e-mail is sent to the new mail address requesting to set an initial new password for the 1NCE Customer Portal.
User Account Alteration
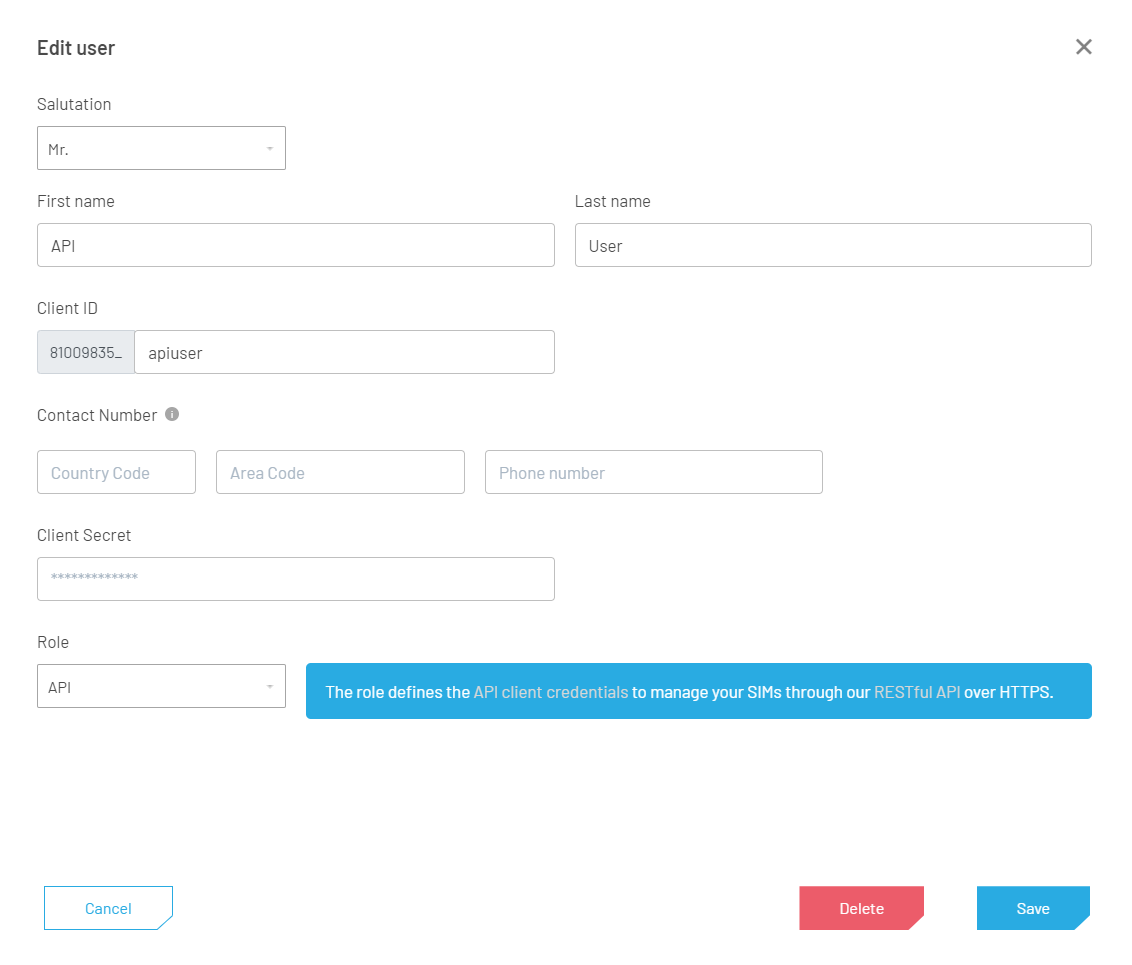
User details can be modified by clicking the edit (pencil) icon next to the corresponding user in the Users list, updating the required fields and saving the changes. Users can be deleted by clicking the trash bin icon next to the corresponding user in the Users list.
Organization Management
❗️ AWS Marketplace Accounts
Please note that Organization Management is not available for AWS Marketplace accounts.
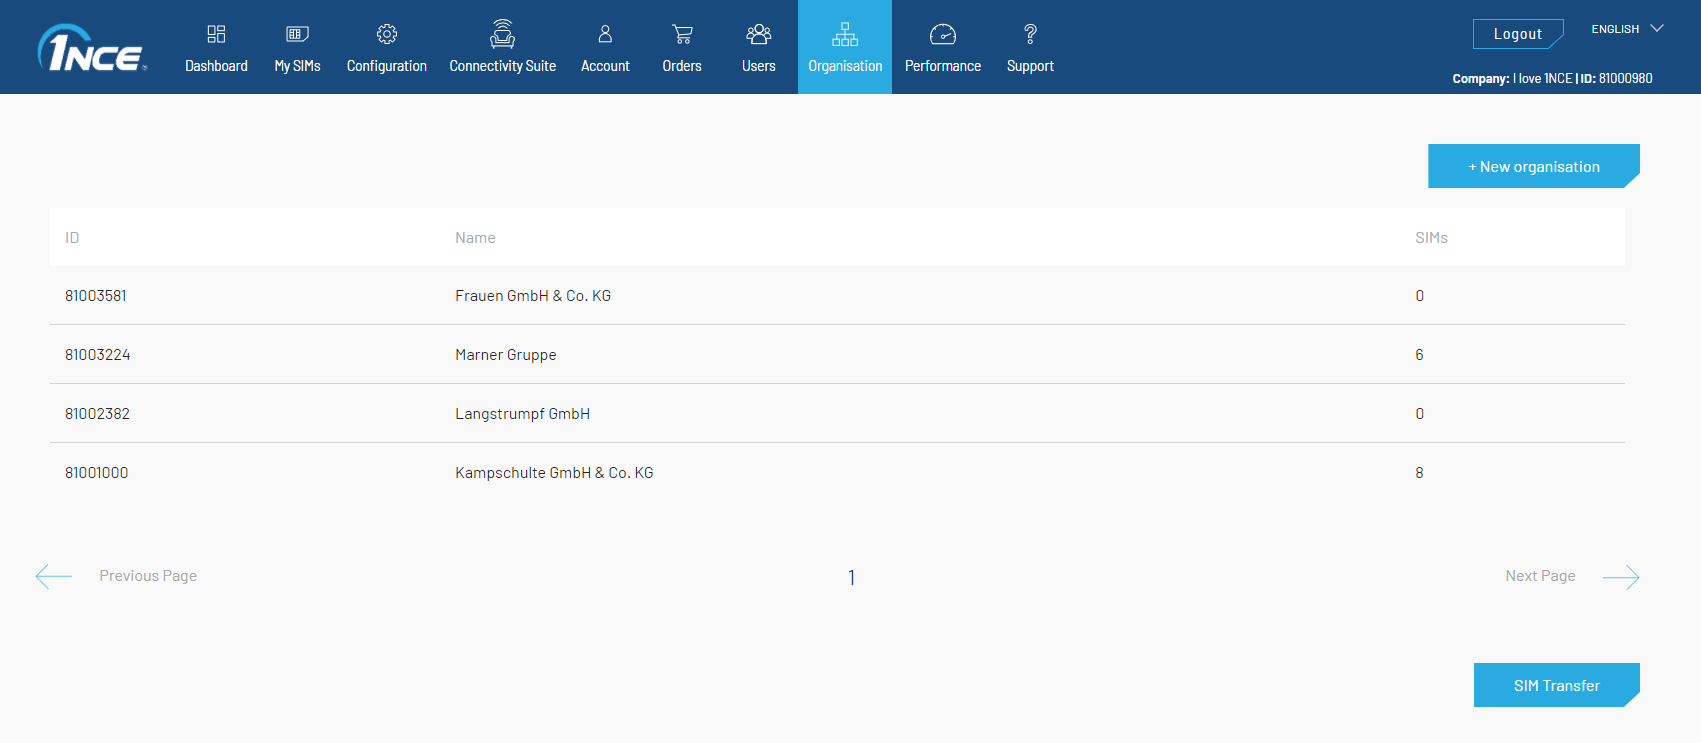
In the "Organisation" tab, a list of all sub-organizations of the main 1NCE user account are shown and can be managed. This feature enables a customer to create independent organizations, e.g., for their subsidiary or sub-contractor.
Organisation Creation
Creating a new organization requires the role Owner or Administrator to be logged in. To create a new organization, users have to click on the "New Organisation" button in the top right corner of the page. The creation process of a new organization is structured in a few simple steps. All the required data have to be entered in the shown forms.
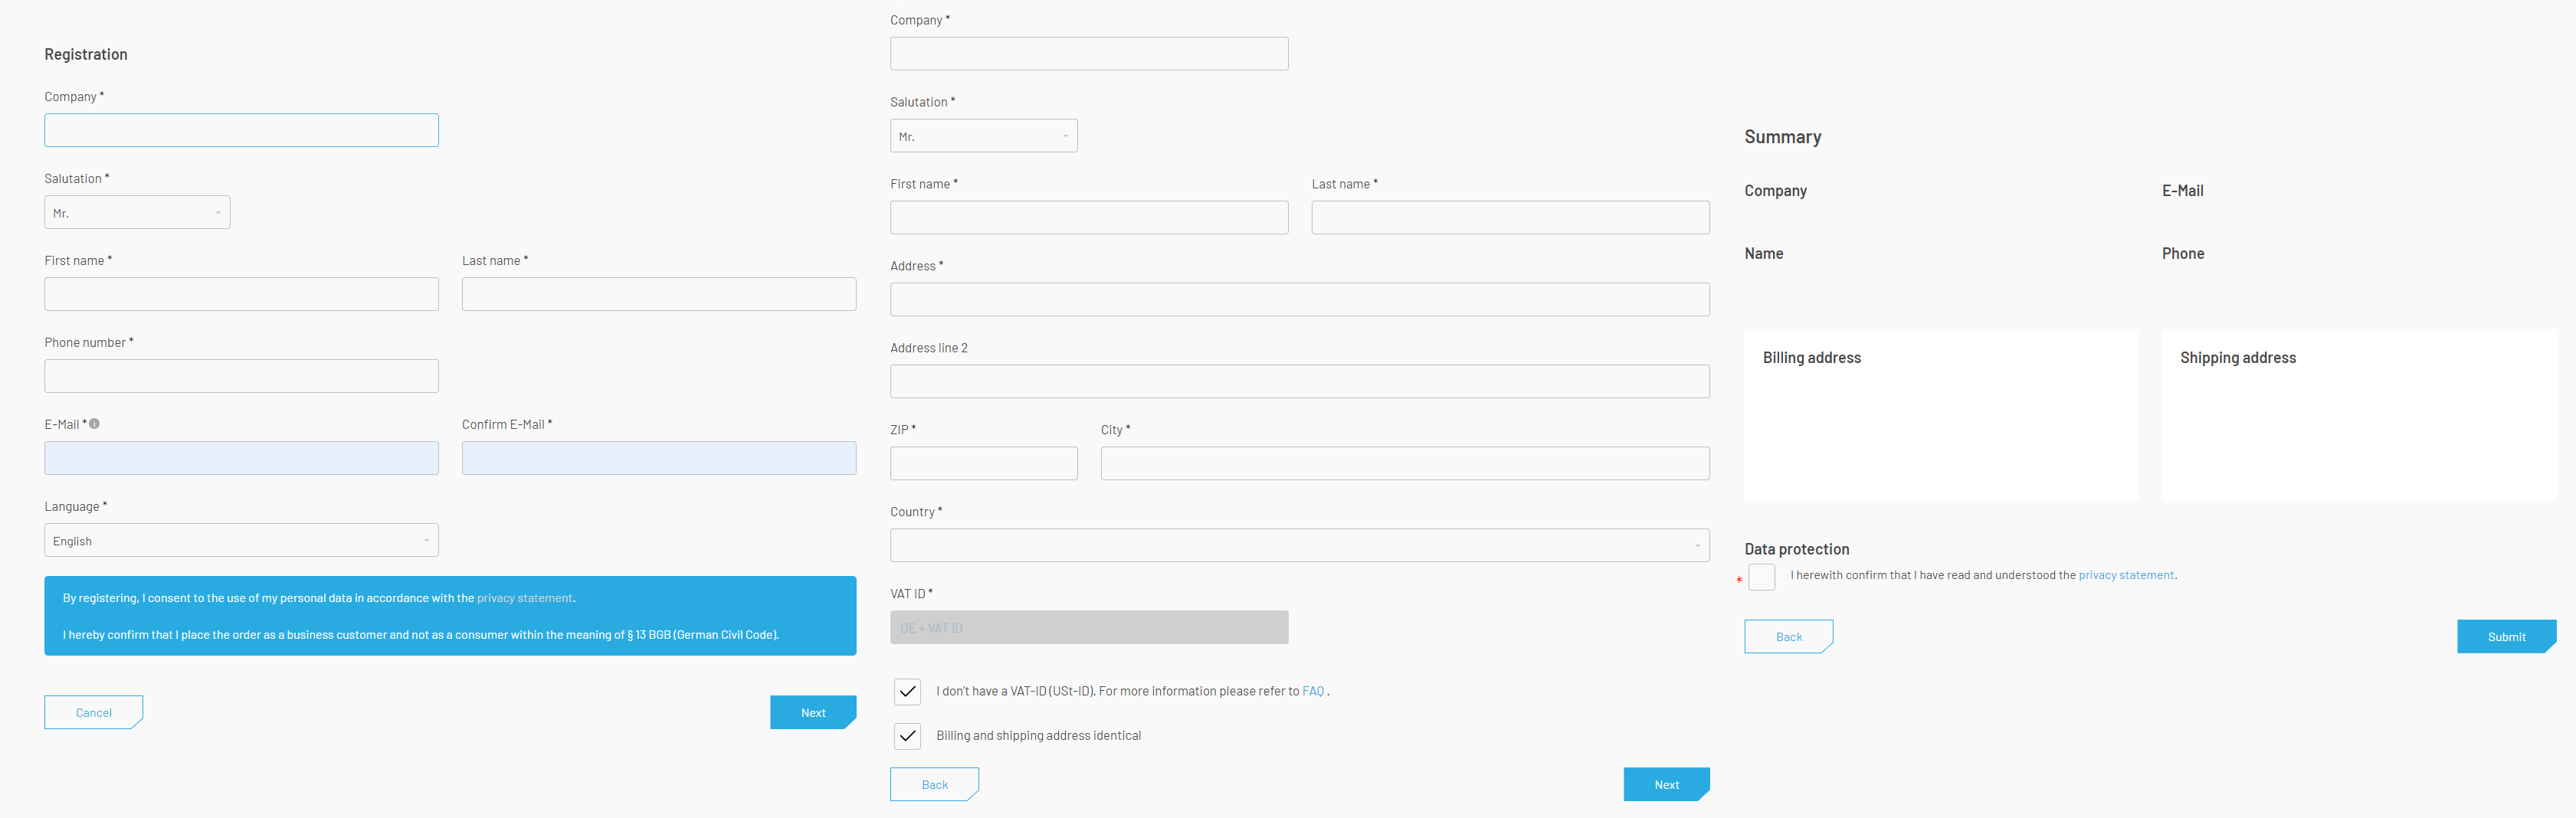
After validating the content summary and submitting the request, the new owner will be notified and asked to set up their password via e-mail, so that they can access the customer portal. Please note that the process of creating a sub-organization will not be finalized until the new owner has set the password.
All existing features are active for the new organization. An order of SIM cards can be placed in the new organization by using the "Reorder" button on the dashboard and go through the regular ordering process. Alternatively, the master organization can order the SIM cards and transfer them to the sub-organization afterwards. The master organization can see the total number of SIMs ordered by each organization, but without having direct access unless a dedicated account has been created by the sub-org entity.
Organization SIM Transfer
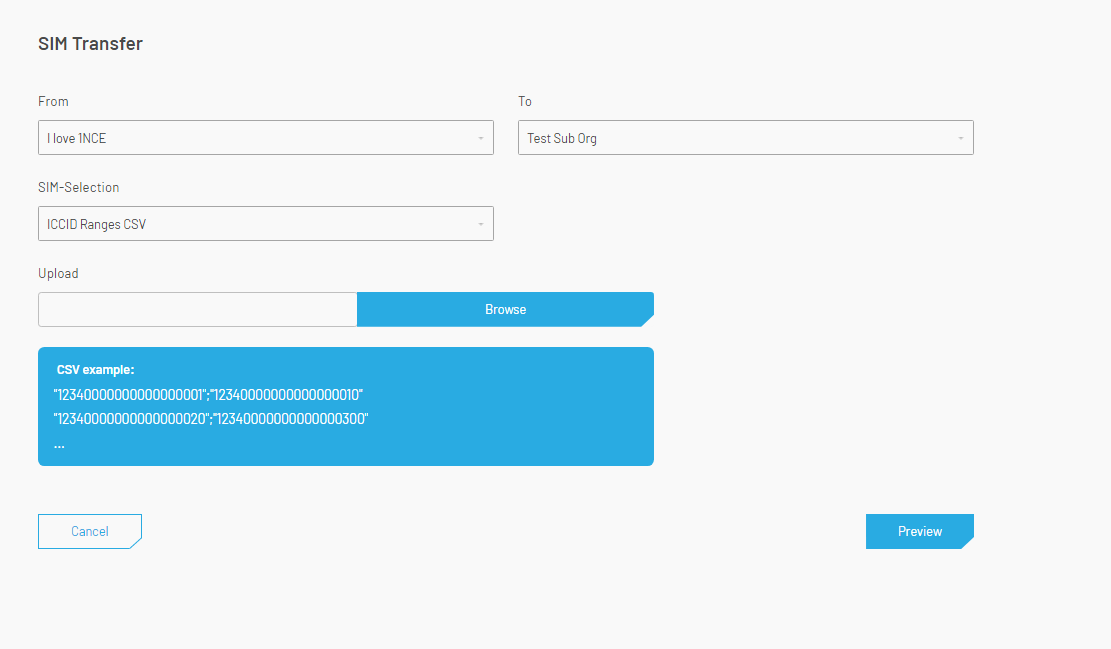
If there are any sub-organizations, the "Organization" tab also offers the possibility to transfer SIMs from the master organization and vice versa. A direct transfer from sub- to sub-organization is not possible. The transfer of SIMs can also be done using the 1NCE API. Customers can transfer just one single SIM, a range of SIMs, or several ranges of SIMs. Here are some helpful tips for transferring several ranges:
- The file with the ranges can either be .CSV or .TXT format
- Single SIM ICCID, use the ICCID as Start- and End Range like “ICCID1;ICCID1”
- Ensure no duplicate ICCID in the file as this will lead to errors in processing
- Do not put a semicolon at the end of each line
- There is no need to use quotation marks at all (not mandatory)
Sub-Organization Deletion
Sub-Organizations can be deleted directly from the portal. To delete an organization customers have to choose the respective sub-organization and click "Delete". A sub-organization can only be deleted after it is fully created and has no SIMs or open workflows running (e.g. open invoices or open SIM actions).