JWT Token Onboarding
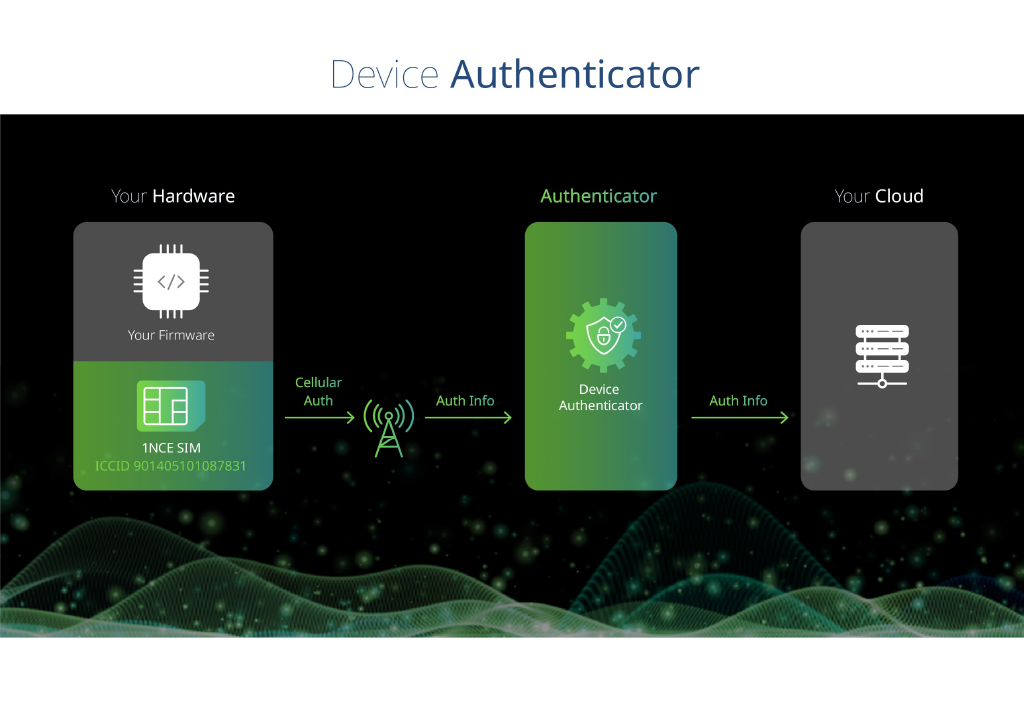
JWT Token Authorization is a suggested connection type, which allows users to connect devices to AWS IoT Core.
AWS IoT Core lets you define custom authorizers so that you can manage your own client authentication and authorization. 1NCE offers such custom authorizers using JSON Web Tokens and using our SIM-as-an-Identity service.
This option offers a much more lightweight solution compared to the X.509 certificates and is optimized for constrained IoT Devices. This option is recommended by 1NCE.
Limitations
- MQTT Clients have to support ALPN and SNI to make use of the Token Authorizer.
- Range request header is not supported
- Currently, customers can connect only one Full Integration account with either X.509 Certificates or with JWT Token Authorization. Only the first deployed Full Integration account type will take effect.
IoT Core Policy
We are using following IoT Core policy for our custom JWT authorizer:
{
"Version": "2012-10-17",
"Statement": [
{
"Action": [
"iot:Connect"
],
"Resource": [
"arn:aws:iot:eu-central-1:9541593XXXXX:client/<iccid>"
],
"Effect": "Allow"
},
{
"Action": [
"iot:Publish",
"iot:Receive"
],
"Resource": [
"arn:aws:iot:eu-central-1:9541593XXXXX:topic/<iccid>/*"
],
"Effect": "Allow"
},
{
"Action": [
"iot:Subscribe"
],
"Resource": [
"arn:aws:iot:eu-central-1:9541593XXXXX:topicfilter/<iccid>/*"
],
"Effect": "Allow"
}
]
}
So basically in this policy we are allowing only subscription and publishing to MQTT topics that contain sim ICCID value at the beginning of topic path: /*.
Device API Endpoint for JWT Token Authorization
After the user has created the correct Full Integration Account connection with the JWT Token authorization option, the user can start the onboarding process by calling a special dedicated onboarding endpoint. A retrieved token is valid for 24 hours.
API Documentation
Base URL: device.connectivity-suite.cloud
Protocol: HTTPS
Supports HTTP Range Request
Path: /device-api/onboarding/mqtt/tokens
GET-Parameters:
Name | Located in | Description | Required | Schema |
---|---|---|---|---|
Accept | header | The Accept request HTTP header advertises which content types, expressed | No | String |
Responses:
Code | Description | Schema |
---|---|---|
200 | 200 response | Tokens |
400 | 400 response | BadRequestResponse |
404 | 404 response | NotFoundResponse |
500 | 500 response | ServerSideErrorResponse |
503 | 503 response | ERROR |
Tokens:
Name | Type | Description |
---|---|---|
username | string | URL encoded string which has following structure:
This value arrives in URL Encoded format, so for some clients it should be decoded before use. |
iotCoreEndpointURL | string | AWS Account region-specific AWS IoT Core Endpoint URL |
clientId | string | ICCID of sim from which connection is made |
amazonRootCaURL | string | URL to the AmazonRoot CA or the CA provided directly Accept: text/csv |
In case if user made request with Accept: text/csv
header, will be returned following comma separated CSV value (CSV header row is not included in response):
"url_encoded_username_value_here","client_id","iotCoreEndpointURL_value_here","amazonRootCaURL_here","amazonRootCa_value_here"
BadRequestResponse
API response when the request is malformed:
Name | Type | Description |
---|---|---|
statusText | string | Http status text |
errors | [ object ] | Detailed error information |
NotFoundResponse
API response when the requested resource is not found:
Name | Type | Description |
---|---|---|
statusText | string | Http status text |
errors | [ object ] | Detailed error information |
ServerSideErrorResponse
API response in case of server-side errors:
Name | Type | Description |
---|---|---|
statusText | string | Http status text |
errors | [ object ] | Detailed error information |
Example
The following example is an output using a regular curl request from a device with a 1NCE SIM Card
Request: curl –i –v https://device.connectivity-suite.cloud/device-api/onboarding/mqtt/tokens
HTTP/2 200
server: awselb/2.0
date: Tue, 30 Nov 2021 07:23:29 GMT
content-type: application/json; charset=utf-8
content-length: 1255
etag: W/"4e7-sVl80yZMl550RNSrOIoxfsT93lE"
access-control-allow-credentials: true
vary: Origin
x-powered-by: Express
{
"username":"JWT_TOKEN_HERE?x-amz-customauthorizer-name=1nce-authorizer&x-amz-customauthorizer-signature=SIGNATURE_HERE&token=TOKEN_HERE",
"iotCoreEndpointUrl":"a18ri6znfXXXXX-ats.iot.eu-west-3.amazonaws.com",
"amazonRootCaUrl":"https://www.amazontrust.com/repository/AmazonRootCA1.pem",
"clientId":"44442222222222XXXXX"
}
Usage examples and code snippets
JWT token authorization is used to reach AWS IoT Core from the device. Currently, users can use either HTTP POST endpoint or MQTT Websocket Connection. In AWS documentation it is described in the following page: Connecting to AWS IoT Core by using custom authentication
HTTP POST example
This approach allows to POST data to IoT Core using the HTTP protocol. All necessary data to execute this request is retrieved in on-boarding response.
The easiest way how to prepare request query parameters is to take the username value, which is returned by onboarding. In it find place where x-amz-customauthorizer-name
begins, and remove JWT token part before that x-amz-customauthorizer-name
and then just concatenate the URL in the following way:
'https://a18ri6znfXXXXX-ats.iot.eu-west-3.amazonaws.com/topics/<clientId>/messages?qos=1&' +
'x-amz-customauthorizer-name=1nce-authorizer&x-amz-customauthorizer-signature=<signature-in-url-encoded-format>&token=<token>'
For username header, there are no modifications needed to username value returned by onboarding request.
Using curl tool you can execute the following POST request:
curl -v -X POST 'https://a18ri6znfXXXXX-ats.iot.eu-west-3.amazonaws.com/topics/<clientId>/messages?qos=1&x-amz-customauthorizer-name=1nce-authorizer&x-amz-customauthorizer-signature=<signature-in-url-encoded-format>&token=<token>' \
-H 'username: <username-value-in-url-encoded-form>', \
-H 'clientId: <clientId>' \
-d '{"data": "Lorem Ipsum"}'
You should get the following response:
HTTP/1.1 200 OK
content-type: application/json
content-length: 65
date: Tue, 30 Nov 2021 14:46:46 GMT
x-amzn-RequestId: 2fa1742f-78c1-8ef6-d300-5ee15552d855
connection: keep-alive
{"message":"OK","traceId":"2fa1742f-78c1-8ef6-d300-5ee15552d855"}
MQTT Websocket Connection example
HTTP POST request works fine if your device supports HTTP and if you only need to post some data to AWS IoT Core, but MQTT protocol supports also subscription to MQTT topics, which can be done by using different MQTT clients.
Mosquitto client example
Probably the simplest tool to use is Mosquitto client GitHub An open source MQTT broker.
First, you have to download AWS Root Certificate using provided URL:
wget https://www.amazontrust.com/repository/AmazonRootCA1.pem
After it is downloaded you can run the following command to post the current date to the test topic:
mosquitto_pub -h a18ri6znfXXXXX-ats.iot.eu-west-3.amazonaws.com -p 443 \
-u "<here_goes_username_value>" \
-t "<iccid>/test" --cafile /<path_to_pem_file>/AmazonRootCA1.pem -i <iccid> --tls-alpn mqtt -d -m "`date`"
AWS IoT device SDK for Javascript
AWS provides devices SDK for different languages to connect to MQTT. One such language, which is supported is Javascript AWS-IoT-SDK-JS.
Here is code snipped how to write client:
function subscribeMQTTTopicToken(
{ clientId, iotCoreEndpointUrl, username },
topic,
onConnect,
onMessage
) {
const parsed = queryString.parse(username.split("?")[1]);
console.log(parsed);
console.log("Registering mqtt client using token");
var device = awsIot.device({
clientId,
host: iotCoreEndpointUrl,
debug: true,
protocol: "wss-custom-auth",
username: username,
customAuthHeaders: {
"X-Amz-CustomAuthorizer-Name": parsed["x-amz-customauthorizer-name"],
"X-Amz-CustomAuthorizer-Signature":
parsed["x-amz-customauthorizer-signature"],
token: parsed.token,
},
});
console.log("Registered succesfully");
device.on("connect", () => {
device.subscribe(topic);
console.log(`MQTT subscribed to topic ${topic}`);
onConnect(device);
});
device.on("close", () => {
console.log("MQTT client connection is closed");
});
device.on("reconnect", () => {
console.log("MQTT client has reconnected");
});
device.on("offline", () => {
console.log("MQTT client is in offline mode");
});
device.on("error", (error) => {
console.log("MQTT client error: ", error);
});
device.on("message", (recTopic, payload) => {
console.log('message', payload);
onMessage(device, recTopic, payload);
});
}
In this function, one important thing to remember is to decode username
variable which from onboarding endpoint arrives in URL encoded format. Those decoded variables then should be used for customAuthHeaders
. Here decoding is done using query-string library NPM: query-string.
Removal of Account Connection with JWT Token Authorization
If user decides to delete such account connection it should be done in the correct order:
- Delete account connection in 1NCE portal


- Remove Cloudformation stack, which is created by Connectivity Suite system in users AWS Account


In case if the deletion was performed in a different order there can still be some leftover in the AWS Account and Region.
For a custom authentication integration, this is the AWS IoT Core Custom Authorizer. This resource should be deleted by hand on the following page:


Updated 18 days ago